# Document Details
On this page, you will find all detailed information associated with a specific Document. Here, you are able to take actions such as adding related Documents, adding and removing tags, and managing attachments. At the top of the page you'll see the Document name and the status that it is currently in. If there is an action required to be taken on the Document, you will see a description of what needs to be done and a link to quickly access the area you need.
# Preview

Here, you will see the details of the Document formatted in a layout optimised for your screen. This layout has been designed to mimic the conventional layout of business documents such as invoices, with conventions such as pushing totals to the bottom-left corner of the page allowing for quick reference and visual identification of Document elements.
Content in the Preview tab is vertically separated into three sections: General document information, line items, and a summary of financial information (including banking details). This information is extracted from the Document.
# Timeline
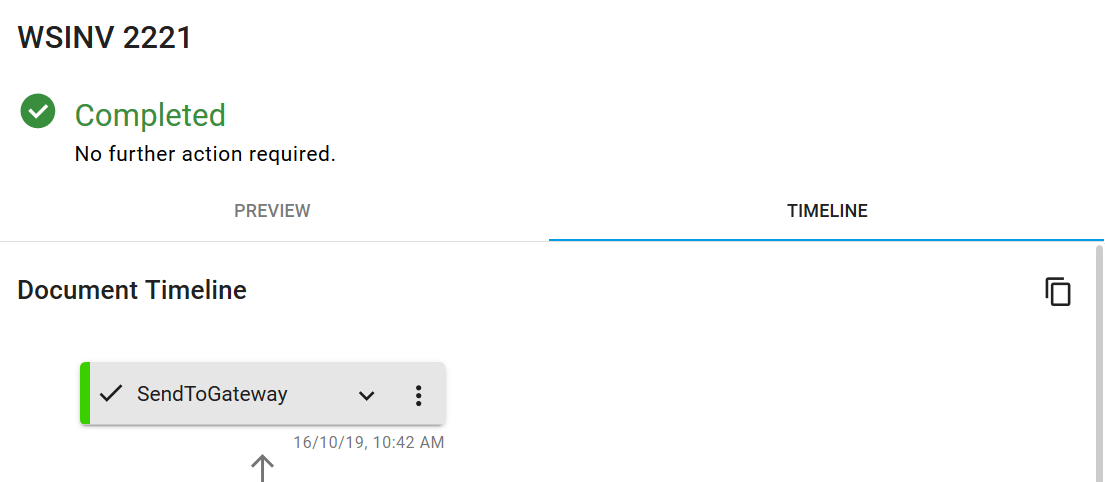
Under the Timeline tab, you'll find the Document timeline, a visual representation of the stages of processing that a Document has undergone. Each of these stages is termed an action.
Each action has two controls available: a chevron button for expanding an action to see attempts against it, and an overflow menu to take further steps on the action.
The overflow menu on an action shows the following options depending on the state and type of action:
| Option | Available | Explanation |
|---|---|---|
| View Rule | Always | Navigates to the page showing the rule associated with this action. |
| View Approval Document | If this is a designated Approval action. | Navigates to the Approval document associated with this Document. |
| Retry | If the document is erred, is not resubmitted, and has an associated rule. | Attempts the failed action again. |
| Discard | If the document is erred, is not resubmitted, and has an associated rule. | Marks the Document as discarded (or permanently failed). |
| View Raw | If the action is completed. | Shows a dialog with the textual content of the underlying Document at the time of this Action. |
Upon expanding an action with the chevron button, you'll see the reasons that cause each action to reach the status they are currently in, with each row representing an attempt. As an example, if a User opts to discard a Document, Users may find one attempt shown in the expanded view of an action, reading "Document has been discarded by User."
The overflow button on an attempt shows a list whose contents vary with respect to the current status and specific attempt in question. The list of available options to take on an attempt are listed below.
| Option | Available | Explanation |
|---|---|---|
| Error Details | If the attempt is erred. | Shows a dialog with technical information used to diagnose a Document error. |
| View Approval Document | If this attempt is against a designated Approval action. | Navigates to the Approval document associated with this Document. |
| View Raw | If the attempt is successful. | Shows raw Document content as it was at the point where this attempt was being run. |
# Related Documents
Due to the complex and ever-changing nature of business documents and their relationships in the real world, it can be difficult to form a concise and well-defined model of document connections that works across all business scenarios or companies.
To work around this technical difficulty, DX2 allows you to connect documents together in a network, signifying not only that they are related but how they are related. This is achieved through the Related Documents feature.
To define another Document as related, click the Add Document button within the Related Documents pane. A dialog will show with two drop-down menus: the type of relationship you'd like to define, and the document to define on the other side of the relationship.
The following table shows the purpose and ideal scenario for each relationship:
| Relationship | Scenario |
|---|---|
| Parent | This Document (an invoice) is the result of a purchase order (its parent). |
| Child | This Document (a purchase order) has a resulting invoice (its child) from being approved. |
| Related | Two invoices (this Document being one) were created from the same purchase order as the result of a split payment. |
After choosing a relationship and a Document in this dialog, click Add Related Document to define the relationship between the two Documents. The related Document will now appear in the Related Documents card, with its Document number shown followed by its Document type.
TIP
Once a related Document has been added, you can navigate directly to it by clicking on its link in the Related Documents card.
To remove a related Document, click the menu icon next to the Document for which you'd like to remove a relationship, and click Delete in the menu that appears. A dialog will show asking you to confirm this deletion. Click the Delete Relationship button to confirm. This related Document will now be hidden from the Related Documents card.
# Attachments
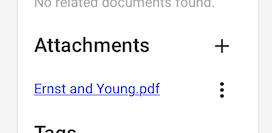
It can often be useful to include information relating to a Document alongside it in the DX2 Portal, often in the form of a PDF, text file, or image. You can achieve this through the use of attachments within a Document, found under the Attachments heading in the left pane of the Document details page.
If no attachments are currently associated with the Document, a message stating No Attachments will be shown in the pane. You can add a new attachment by clicking the button. This will open a dialog window allowing you to choose between previously uploaded files, or a file stored on your computer to be uploaded.
WARNING
You cannot delete attachments once they have been added to a Document. Please ensure you carefully choose the appropriate files to attach to Documents.
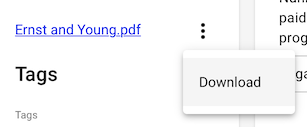
To download attachments associated with a Document, click the button found on the right side of the attachment list item, then click Download in the menu that appears.
# Tags
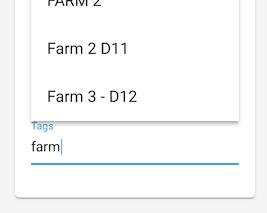
Documents can have a large and complicated context behind them, often warranting attention from many different parties, and this context can change over time. To allow easier management and lookup of Documents given this complexity, every DX2 Document can have tags assigned to them. How each Trading Partner chooses to use tags is at their discretion, and there is no limit to the number of tags that can be assigned to a Document.
To add a tag, simply start typing your tag in the text field found within the Tags card of your Document. You will be prompted with suggestions from tags found in other Documents depending on the text you begin to type. Suggestions will refine as you continue typing, and these suggestions will hide from view if what you type no longer matches existing tags. However, you may continue adding tags irrespective of whether they are suggested or not.
To accept a tag suggestion, either use the arrows on your keyboard to select a suggestion and then press the enter/return key, or click on the suggestion. The suggested tag will now appear in the list of tags.
To type a tag that is not suggested, type the tag you would like to add in the text field within the Tags card. Following this, either press the tab or return keys on your keyboard, or click outside of the text field. Your new tag will now appear in the tags list.

TIP
Duplicate tags cannot be added to Documents, and will be ignored when submitted.
To remove a tag, click the to the right of the tag within the Tags card. The tag will now be hidden from the list of tags, and the association will be removed.
# External Comments
TIP
If you Collaborate on the platform with an 'Active' Trading Partner you will see the tab. ('Active' defines a supplier you are actively collaborating with on the DX2 platform).
Often, employees will need to communicate with the business on the other side of a Document, whether it's raising a point of conflict that will require administrative action on a Document, or simply making something known to add relevant context to anyone working through this Document in the future.
Comments are designed to facilitate this discussion, allowing for a system of communication that doesn't separate discussion from the business entity in question.
To get started, click the Message tab (refer to screenshot) when viewing. Any communication or activities will be listed here. If no comments have been submitted against this Document, a message will show stating Add a comment to discuss the document with your Trading Partner.
WARNING
Comments are used for external collaboration (between the two Trading Partners involved in Document exchange), and will be visible to the other Trading Partner.
# Sharing a document
Dx2 allows you to share your document with an external party.
If you need to share a document, simply navigate to the share icon and select it. You will then be able to enter the email address you wish to share to. An audit of the action of sharing a document can be seen in the Activity Panel, who shared and who the document was sent to.
TODO: screenshot required
# Commenting on a document

To add a comment, click the Write a new comment text box, and start typing your comment. Once you are finished typing, click the Submit button found to the right of the text box. Your comment will now appear in the list of available comments for the Document for both your Trading Partner and the Trading Partner on the other side of the Document.
TIP
The page may reload when you submit a comment. This is expected, and the comment should appear as expected after the reload completes.
# Document Activity
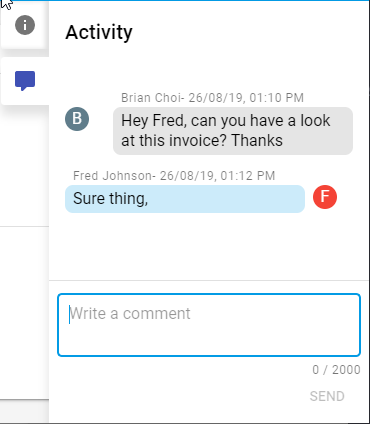
The Internal Panel acts as both an activity register and an internal communications panel.
To get started, click the Messages tab on the right-hand sidebar within the Document's details. The Messages tab is underneath the Information tab and has a messaging icon. This is automatically updated as the document progresses.