# Approval Distributions
You can view the coding information, approval chain assignment, descriptions and apportion of distributions in the approval distribution lines. To complete an Approval Document, the distributions must all have an account code, approval chain and an amount. The amounts must all add up to the subtotal.
Depending on the status of the Document and whether or not you have been assigned the Document, you may see one of the following:
- A blank distribution table (brand new Document)
- A partially filled out distribution table (pre-populated by another user or via suggestions)
- Read-only distributions (you haven't been assigned the Document)
If you have been assigned a Document to code, you will be able to create and edit distributions. Simply start entering data and a new distribution will be created on-the-fly. Don't worry about the last one being blank.
TIP
If you have processed an invoice or order from the Trading Partner before, it may automatically populate the distributions for you.
Use the Suggestions menu to apply any suggestions or to clear them.
Use percentage amounts if you want the system to remember suggestions for next time.
# Account Code
The account code (or GL code in Microsoft Dynamics GP) indicates the type of expense the distribution will be attributed to.
WARNING
These account codes must be the same as what you would use for your financial system. See Setup Approvals for more details.
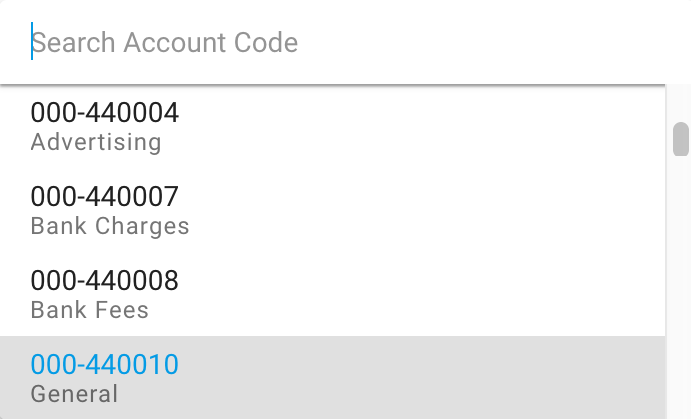
To select an account code, simply click on the account code drop-down list and select the account code you wish to attribute the expense to.
You can enter a partial or full account code or description to search for the account, e.g. 000, general, or even 440 general. To clear the search, select the Clear Filters icon on the top right of the search.
TIP
The account code is filtered by the approval chains (and vice versa). If you do not see the account code you want, select the None option, then search for the account code again.
# Analysis Tag
Analysis tags allow flexible tracking and reporting of your expenses for anyone in your organisation. See Setup Analysis Tags for more details.
Required and Suggested Analysis Tags
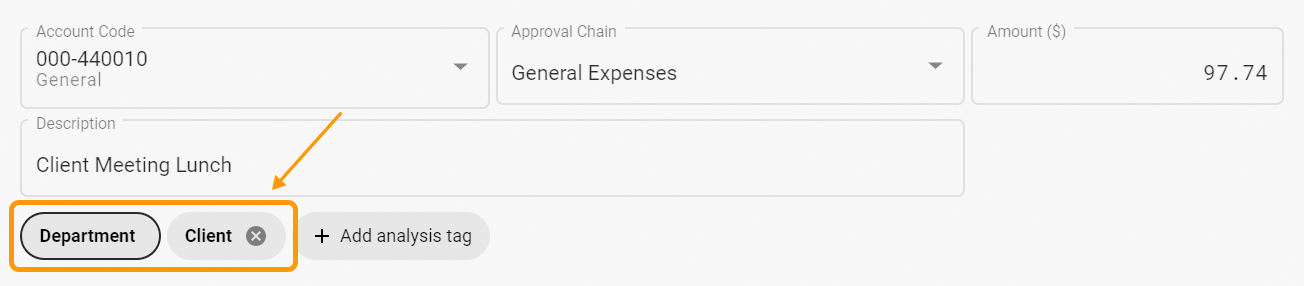
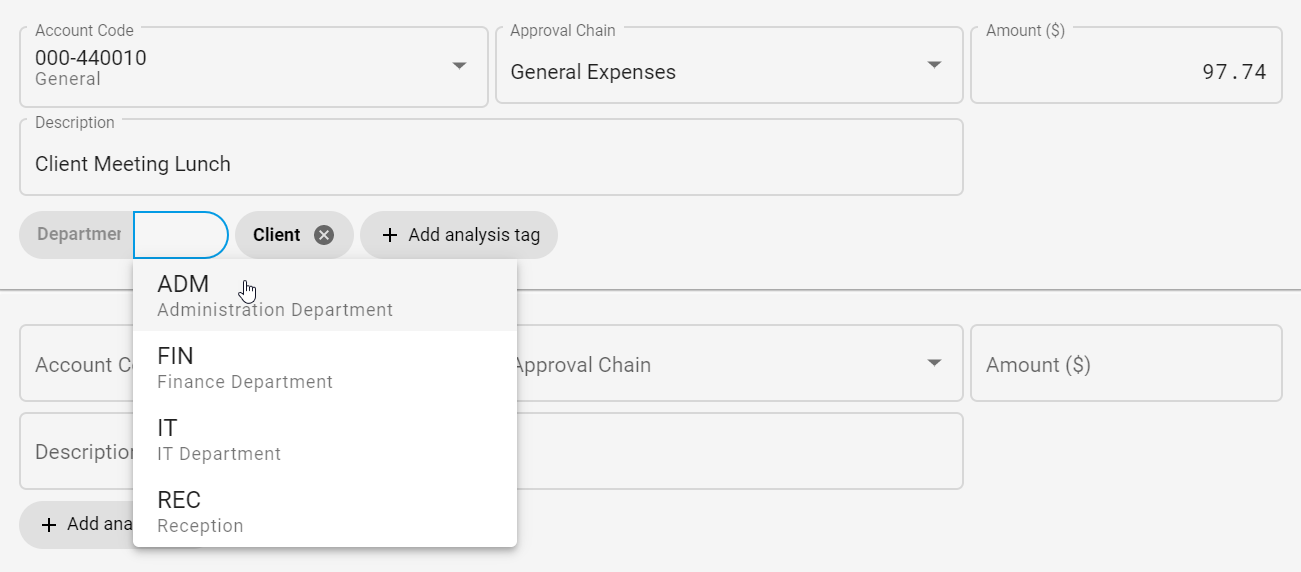
Depending on how the selected account code has been setup, you may see some analysis tag(s) pop up for that distribution line. Analysis tag(s) setup as required for the account will have a darker border around them and they cannot be removed from the distribution line. Analysis tag(s) which have been setup as suggested for the account will not have this border and can be removed from the distribution line if it is not relevant for this transaction.
Select a value for the Analysis tag(s) from the drop down list where a list is available.
If an analysis tag is defined as an autocomplete type, new values can be entered and used.
Additional Analysis tags
In addition to the analysis tags which will pop up based on the account code setup, further analysis tags can be added to a distribution line. These include analysis tags which have already been setup as well as the ones which are not.
For example, the below analysis tags are for attributing a laptop purchase to the Finance department and employee John Thompson. The IT Department can also add in the Hardware ID analysis tag, which they can use for asset and warranty tracking purposes. If the Hardware ID was already setup as an analysis tag it will show in the list of analysis tags when a new tag is being added. If it has not been setup previously, a new analysis tag definition can be created for it on the fly.
To add an analysis tag, just click on the Add Analysis Tag button, provide a key (e.g.Hardware ID) and a value (e.g. ZXFAM-1489234).

TIP
Additional analysis tags can be added by any authorised user at any time, including post-approval.
To remove an analysis tag, click on the button on the analysis tag. Mandatory Analysis Tags cannot be removed.
# Approval Chain
The approval chain is the work-flow of approvers that will be assigned to the Document to approve. For more details on how the approval chains work, see here.
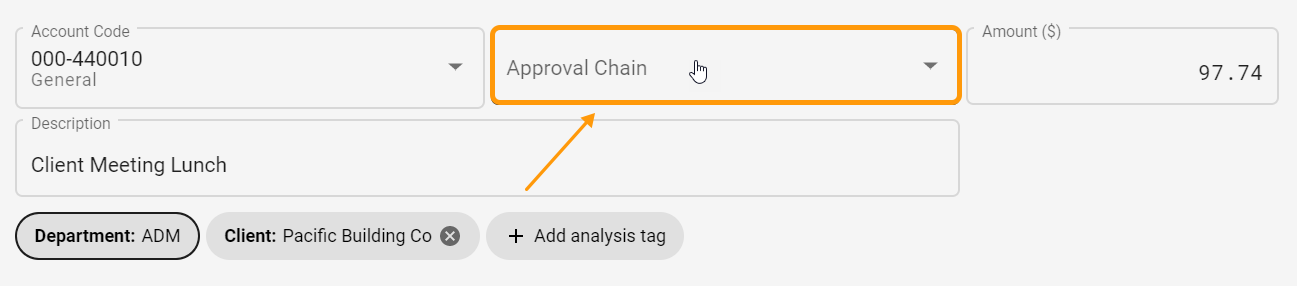
To select an approval chain, simply click on the approval chain drop-down list and select the approval chain you want to approve the Document. Only those approval chains will be displayed in this list which meet the conditions setup for the approval chain.
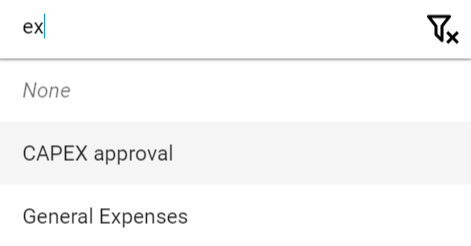
As with the account codes, you can enter a partial search term to find the approval chain you want.
TIP
The order in which you enter the account code and approval chain does not matter. Selecting an approval chain first may be beneficial as it filters the list of eligible account codes.
TIP
The order in which you enter the analysis tag value and approval chain does matter. Entering an analysis tag value first may be beneficial as it filters the list of eligible approval chains.
# Amount
For distributions, there are two types of amounts that DX2 Approvals supports:
- Posting ($ amounts)
- Unit (unit/statistical accounting)
The amount input you see depends on the account code you have picked earlier.
# Posting ($ amounts)
In most cases, when you click on the amount input, the amount overlay shows up like below.
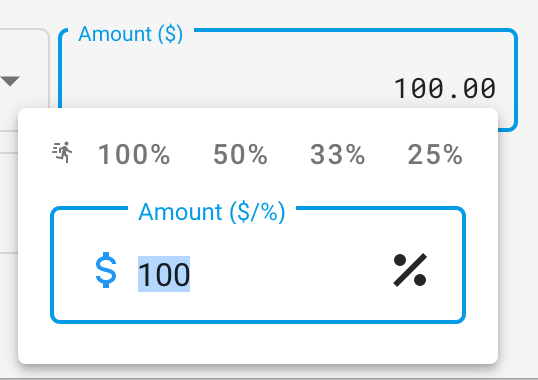
You can split the distribution by entering a dollar amount or by entering a percentage.
Click on the $ or % sign to indicate whether you have entered a dollar amount or a percentage (or type in a dollar or percentage symbol to switch between the two). For common percentage options, there is a "quick amounts" option above which sets the amount for you.
For example, to make a distribution take up 50% of the invoice, I can do one of the following:
- Click on the amount input, type in
50%, or - Click on the amount input, type in
50, then click on the % symbol, or - Click on the amount input, click on 50% on the Quick Amounts toolbar
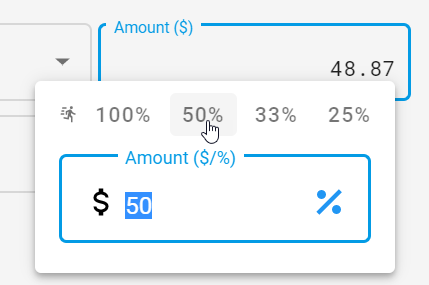
The amount on the distributions card always reflects the dollar value, rounded to two decimal places.
TIP
For DX2 Approvals to remember your distributions for next time, use percentage amounts whenever possible.
# Unit
When the account code corresponds to a unit (also known as statistical accounting) account, you will see the unit amount input (as shown below) instead of the normal amount overlay.
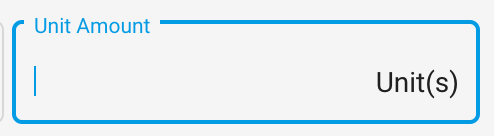
Simply type in the unit amount as per normal, taking care to know what unit it corresponds to.
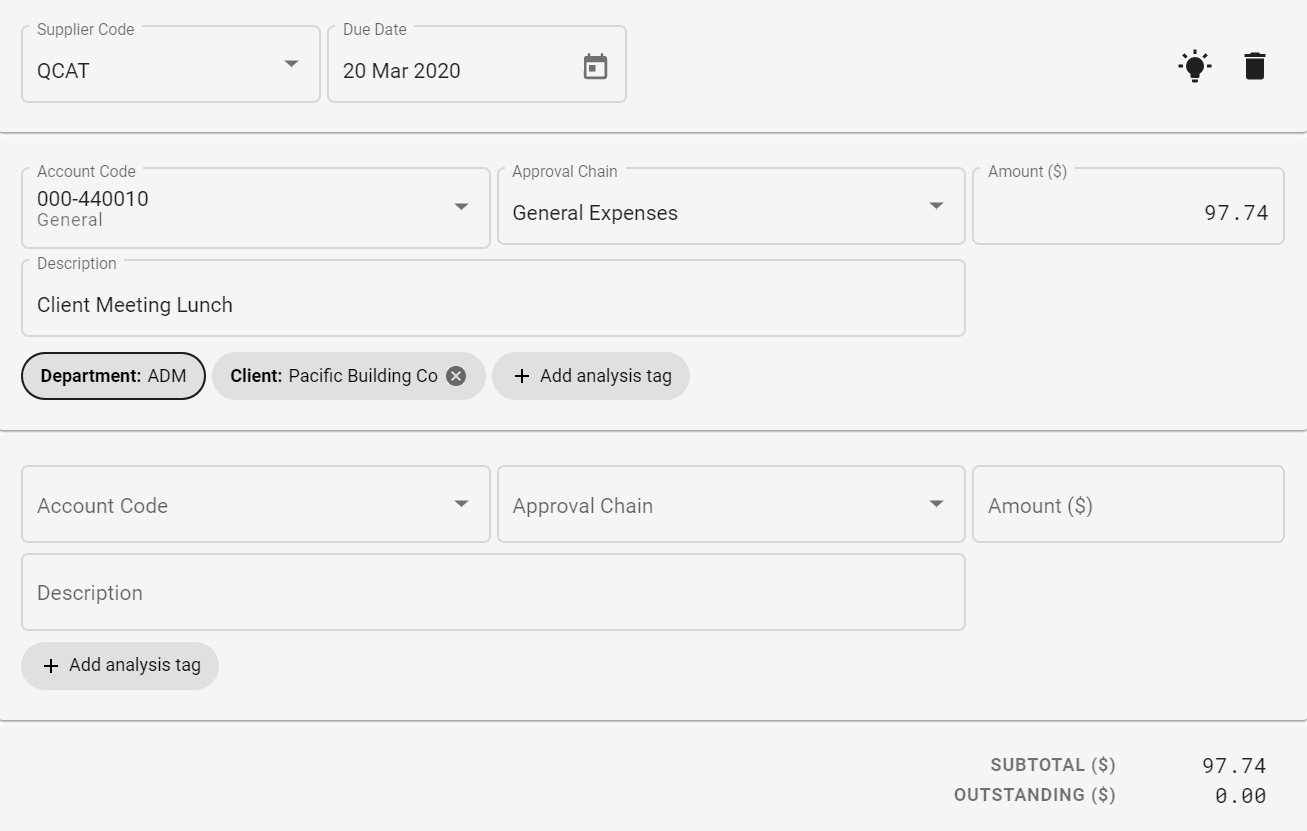
# Adding up to the Subtotal
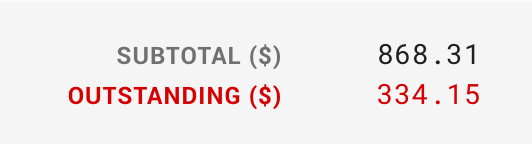
The invoice subtotal is displayed underneath any outstanding amount that has not been entered.
The distributions must balance back to the subtotal of the Approval Document in order for the Document to be valid. This is indicated in red on the bottom right of the distributions card.
Unit amounts do not count towards the $ amount subtotal.
# Description
Enter an optional description to be displayed in Approvals and to be sent to your financial system.

WARNING
Be sure to save (or action e.g. Confirm Distributions) the Approval Document, otherwise you will lose your changes. You can find the Save button on the state banner (on the top in desktop, bottom on mobile).
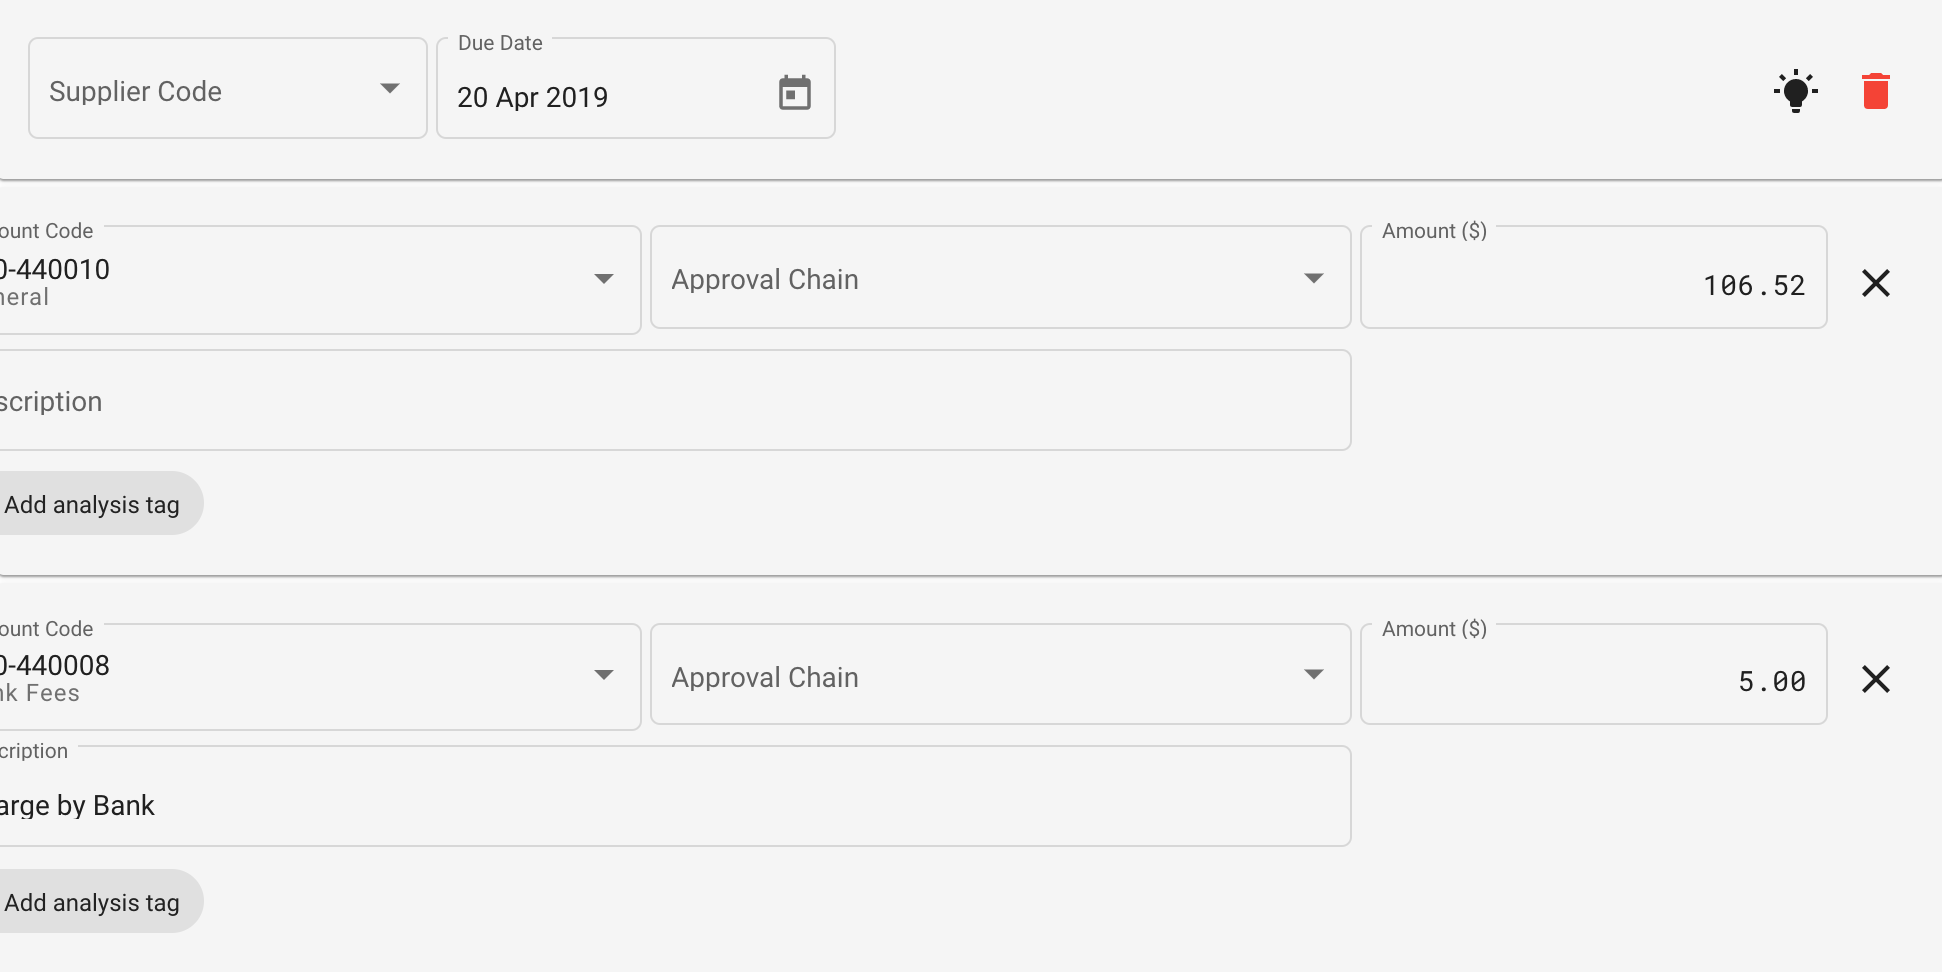
# Deleting a Distribution
To delete a distribution line, click on the delete icon on the top-right of the distributions card.
This will put the distribution lines into delete mode where you can click against the lines you wish to delete.
To close from delete mode, simply click the delete icon on the top-right of the distributions card again.