# Document Information Panel in Approvals
The document information panel is a recent addition to both the Document Details and Approvals sections. It's designed to help you to quickly understand the overview of the Document, especially in context of other related Documents and the conversation and activity around it.
TIP
On mobile, the panels show up as additional tabs on the page.
# Document Information Panel
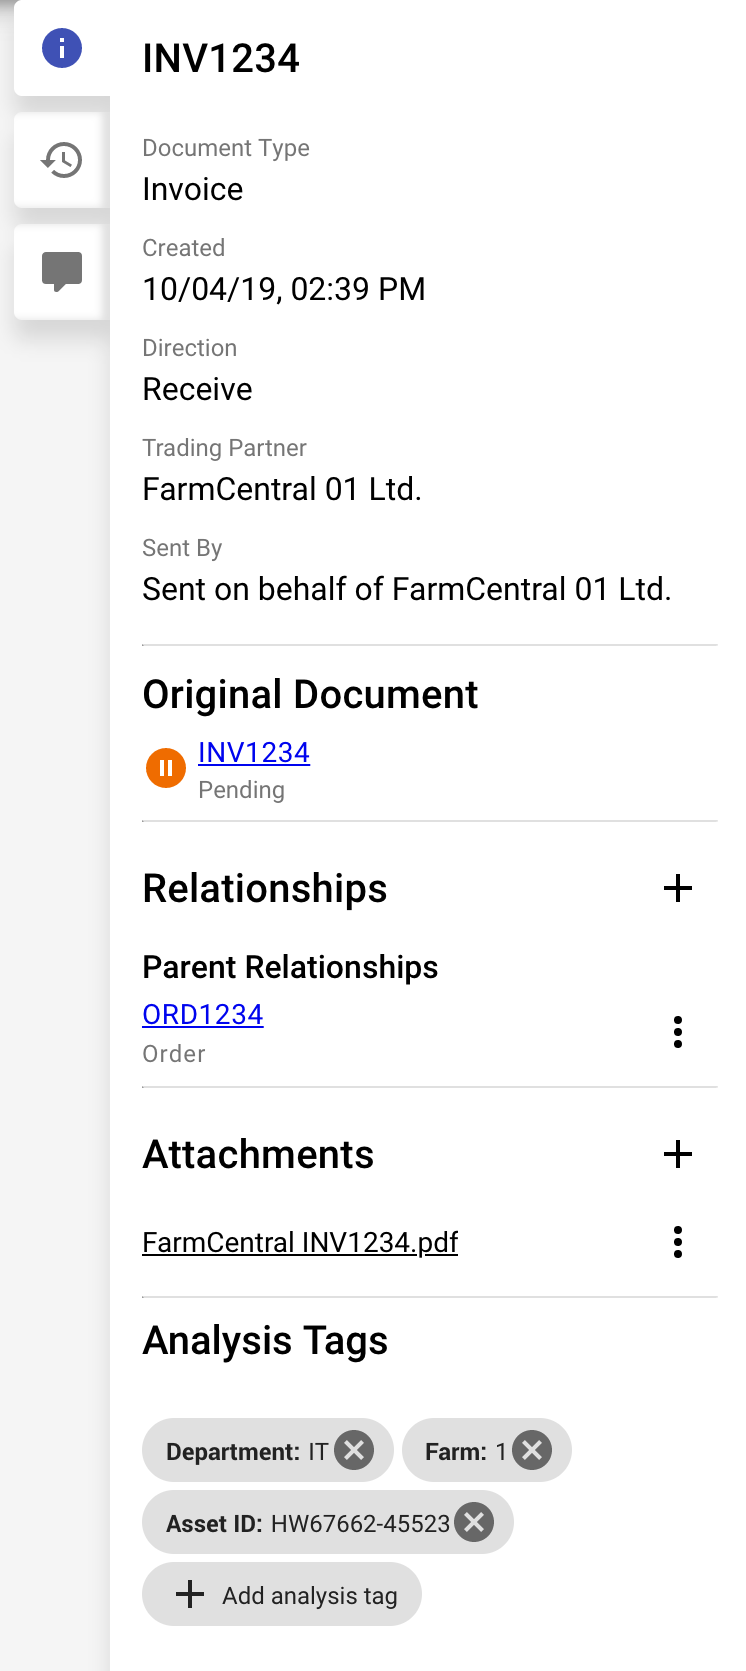
The Document information panel is designed to facilitate information about the Document and its relationships to other Documents. It shows:
- The Document's type
- When it was created
- The Trading Partner who sent the Document (and whether it was done on behalf of the Trading Partner)
- A link to the original Document (see Document Details)
- Any relationships to other Documents, such as orders, invoices and requisitions
- The original PDF and other attached files
- Tags
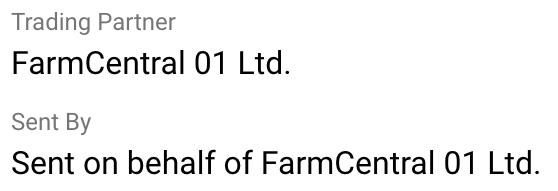
# Trading Partners and On Behalf Of
"On behalf of" is when the Document was submitted to DX2 by your organisation, rather than the Trading Partner themselves.
For example, if you received a Document via physical mail, and someone in your organisation scans in the invoice and processes it with Capture, then it is said that you have submitted the Document "on behalf of" the other company.
This is shown on the Document information panel under the Sent By heading.
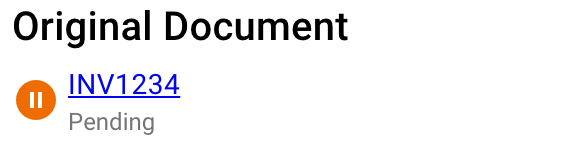
# Original Document
This section shows the original Document in which the Approval Document was derived from. The link takes you to the Document Details, where you can view the overall status of the Document, and see how it is tracking across DX2 and your financial system.
# Relationships
The relationships section displays all related Documents. Relationships provide context on what is related to each other and in what way. This is used for automatic two-way matching in Approval and conveniently allows you to navigate between them.
For example, you may have a requisition that was made in DX2 Purchase. This will show up in the DX2 Portal as an external link back to DX2 Purchase.
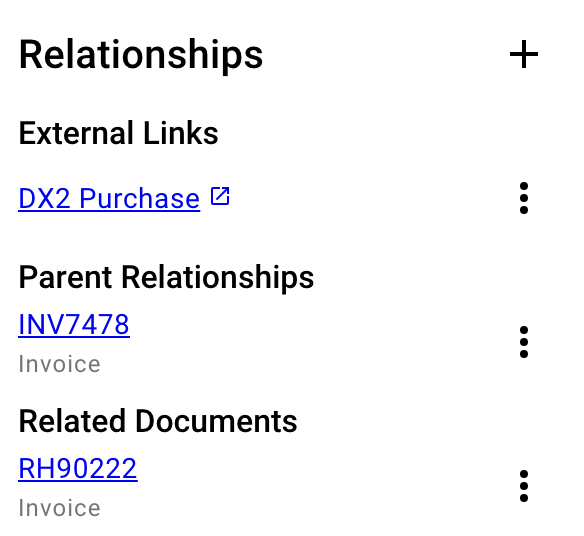
There are four types of relationships in DX2:
- Parent - Indicates that it is the source of the Document, for example the order is the source of the invoice that comes in.
- Child - The opposite side of the parent relationship. For example, you will see a child relationship on the order for the invoice.
- Related - Indicates that it is related to the Document in some way.
- External - Indicates it is an external link, e.g. to DX2 Purchase.
With some integrations, DX2 can automatically relate the Documents as needed. For example, for an invoice that comes in through Capture, it looks for the order number to try match it with an order in DX2.
Click on a link to go to the Document or external website. To remove a link, just click on the triple-dot menu and click Remove.
You can relate Documents manually by clicking on the Add Relationship icon. You will be choose whether you want to create a Document or external relationship. If you are relating a Document that exists within DX2, click Add Document Relationship, otherwise if you want to add a link to another website, click Add External Relationship.
TIP
A document may only have one parent or child relationship.
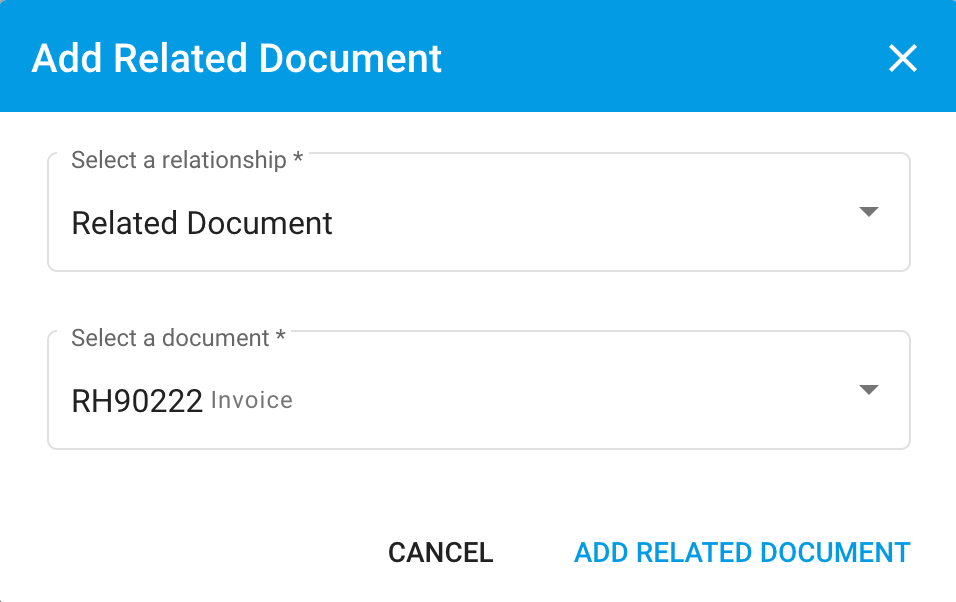
# Add Document Relationship
Simply select a relationship type, search for a Document you want to relate to, and press Add Related Document to confirm.
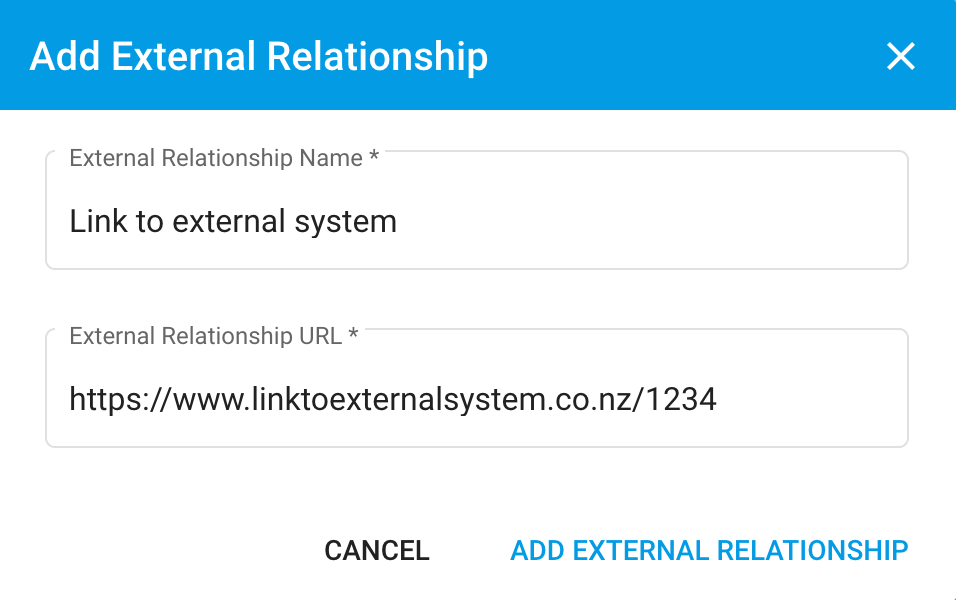
# Add External Relationship
Simply enter a name for the relationship, provide a URL to link to and press Add External Relationship to confirm.
# Attachments
You can attach (and view) files onto the Document. When sending a Document using Capture, the original PDF or image file is automatically attached to the Document. This is useful if you want to see the paper-copy of the invoice or order.
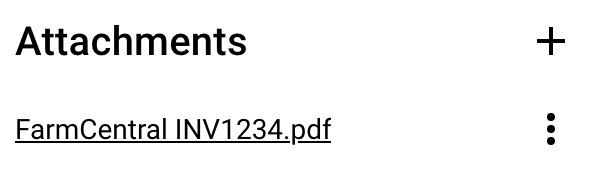
Simply click on the link to view the attachment on your screen. To download it, simply click on the triple-dot menu and click Download.
To add an attachment, use the Add Attachment icon, and select a file from your computer or from Capture to attach to the Document.
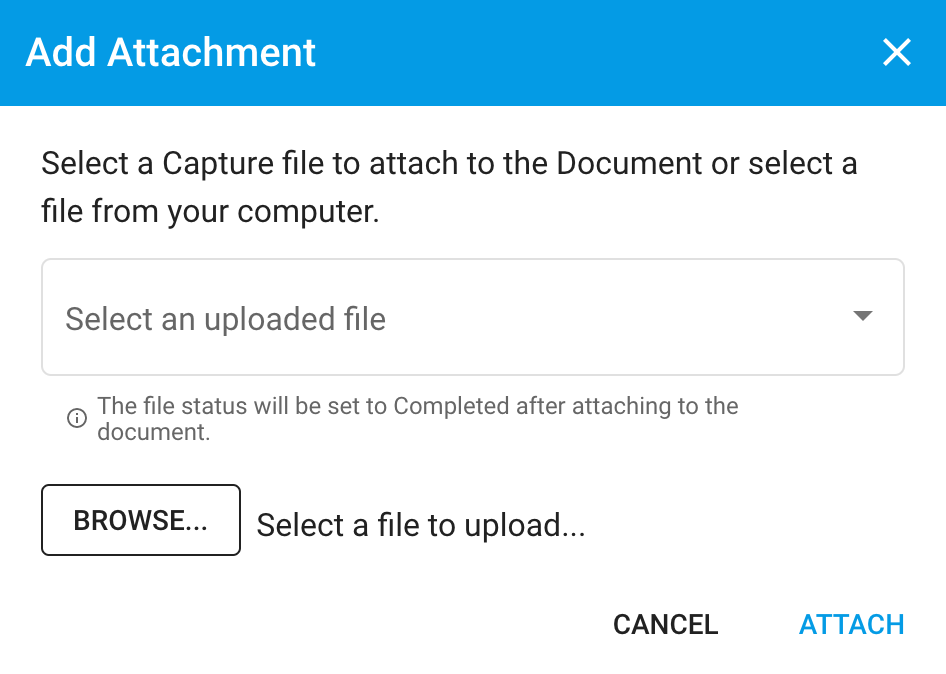
WARNING
Please note that you cannot remove attachments at this time.
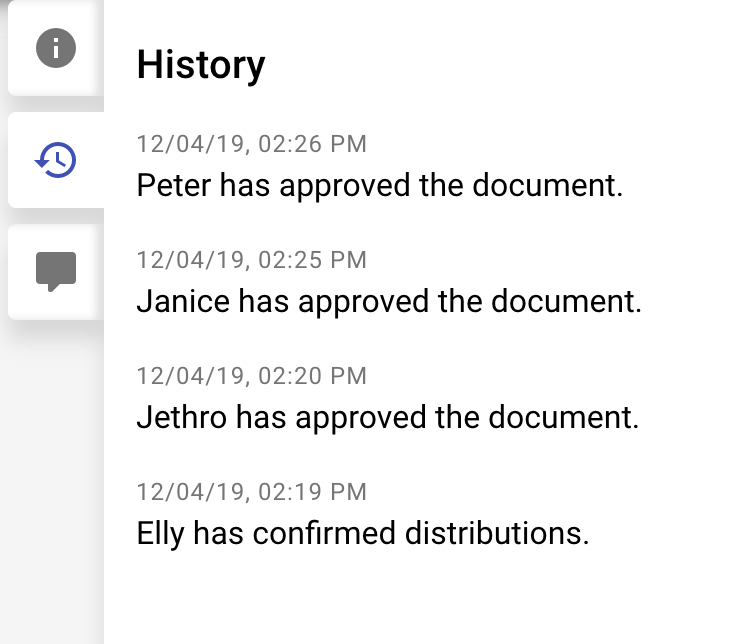
# History Panel
The history panel provides an audit trail of what has happened to the Approval Document from when it was created, coded by the AP Clerk, to being approved. The audit history shows the user, the action they have performed, and when it happened.
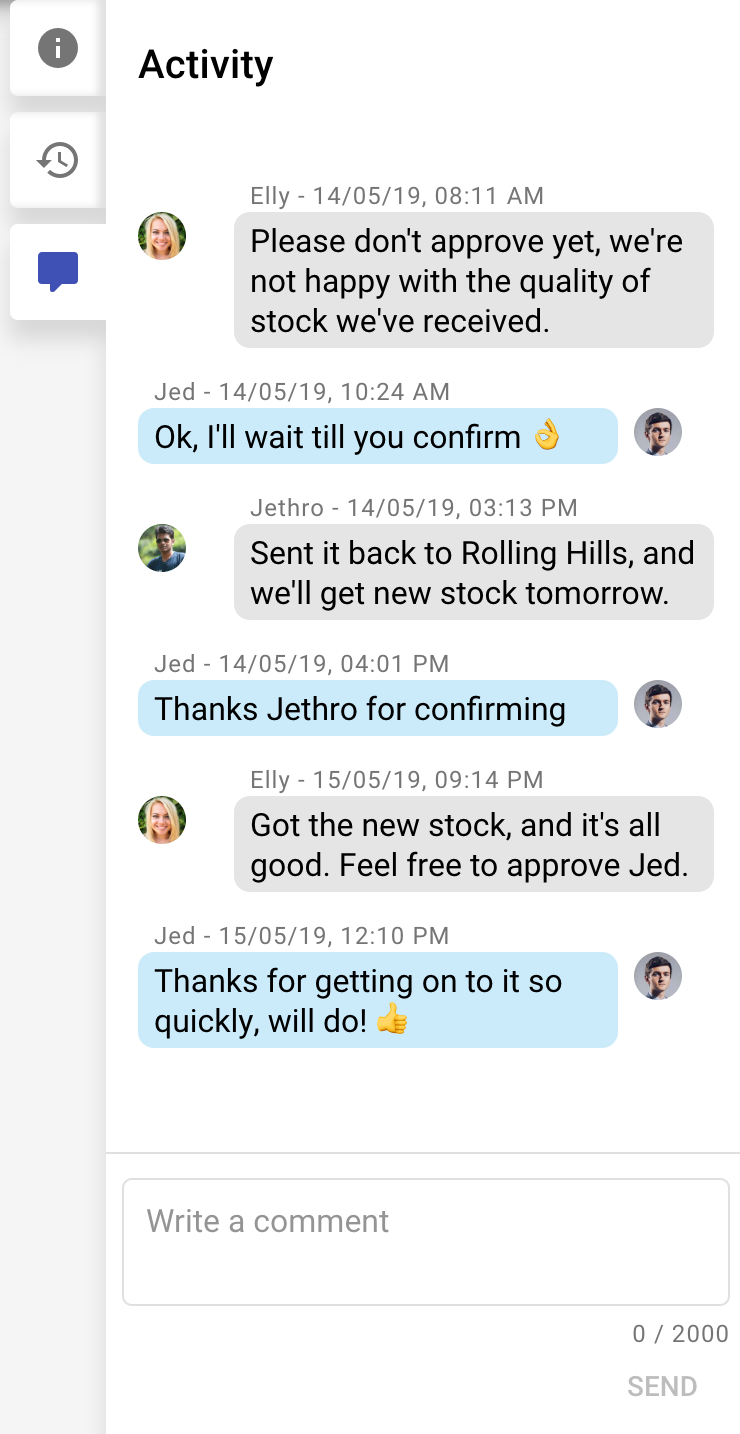
# Activity Panel
The activity panel allows you and others in your organisation to comment on Documents. Instead of using email, the activity panel allows you to have and keep the conversation in a place where it will be stored with the Document.
Simply write a comment to get started!